Custom electronics, costume experiments and lessons from the workbench. A closer look at the projects behind HighTech Cosplay.
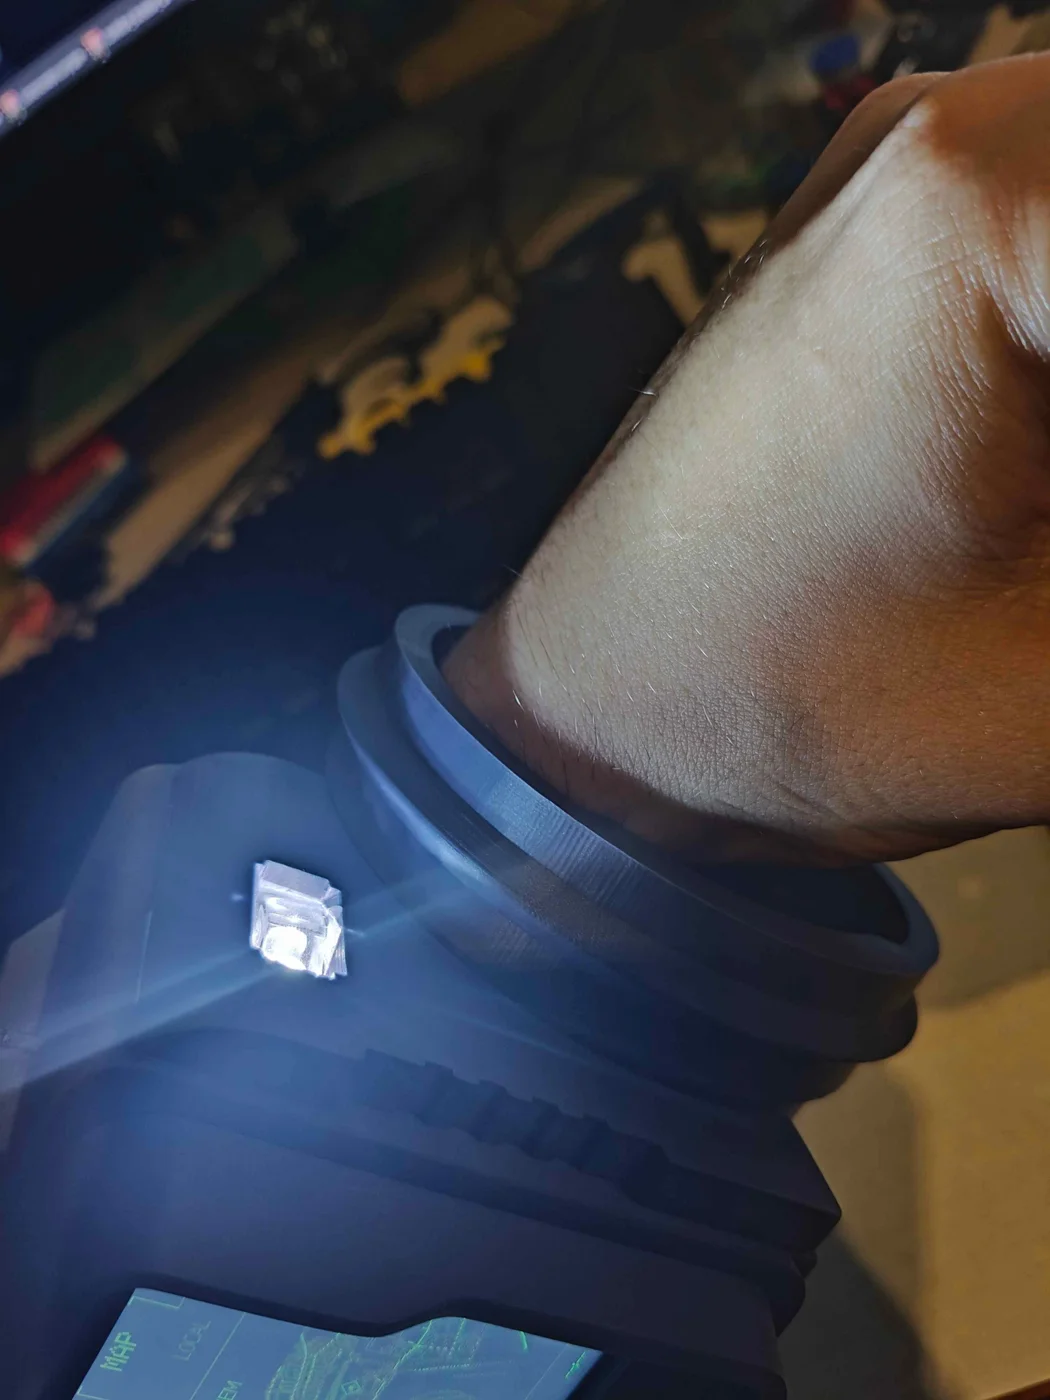
Worn on the arm, with the flashlight switched on.
Workshop journal / Personal build
Building My Own Pip-Boy-Inspired Firmware
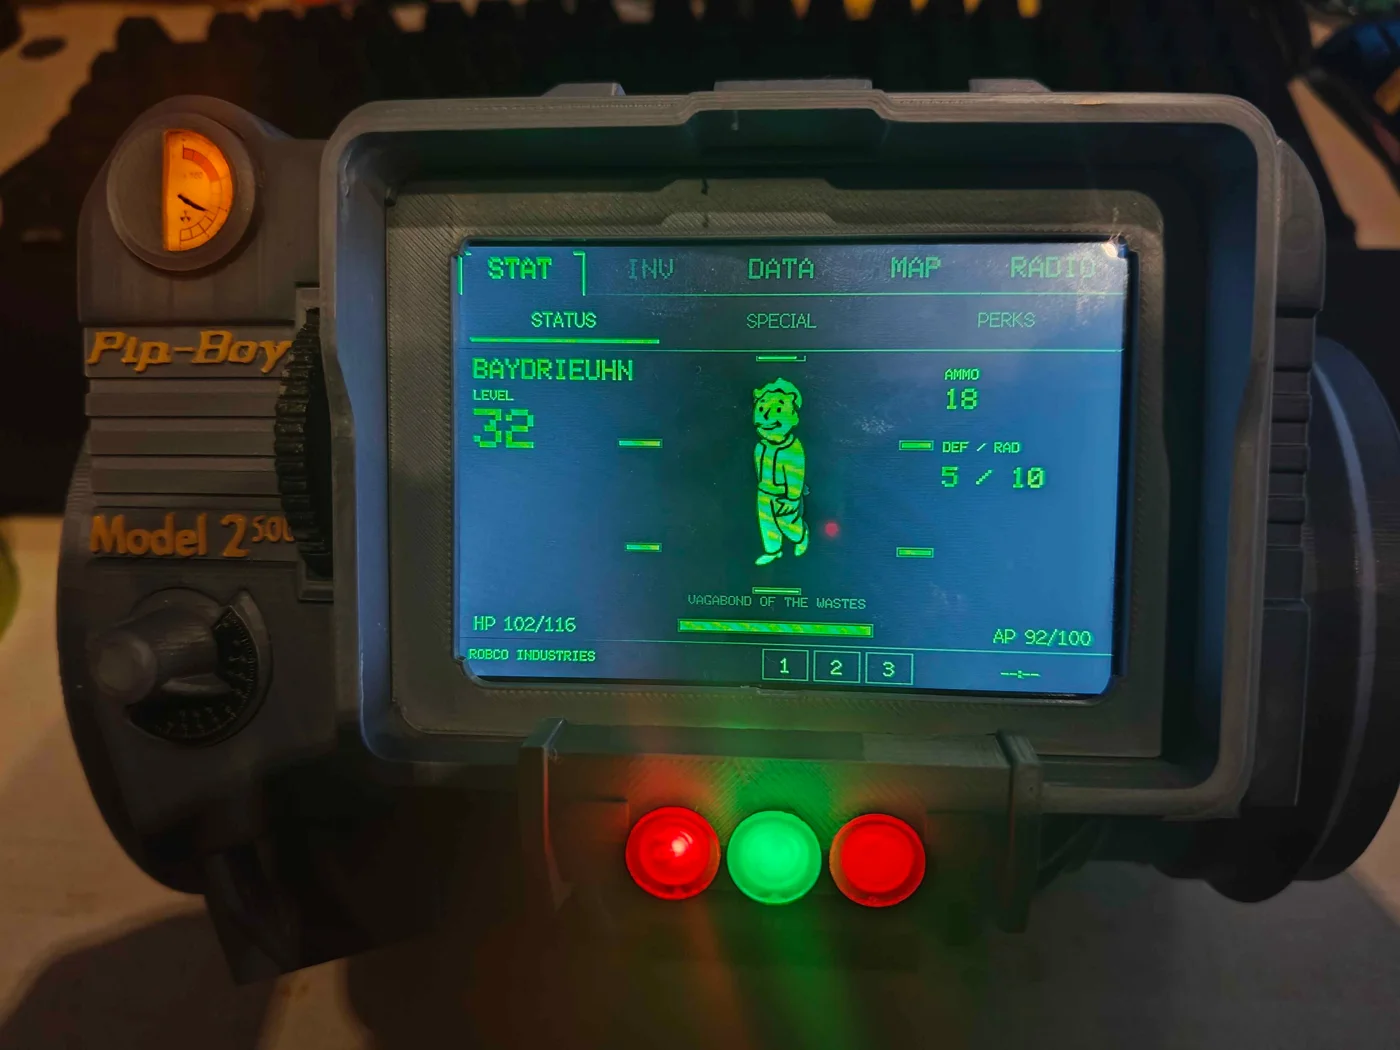
For my Fallout kit for Halloween, I wanted a Pip-Boy that did more than just look the part. I went looking through existing firmware repositories, but everything I could find was essentially a facsimile of the interface. It could look like a Pip-Boy, but it was not the fully featured version I wanted to wear. In the end, I decided to write the firmware myself.
The point was to make the familiar interface genuinely interactive. My firmware supports custom inventory, maps based on real locations—including where you actually live—and proper radio-style music playback. The aim was to have the functions you would expect from a Pip-Boy, rather than a static screen that only imitates them.
The physical Pip-Boy is now built, as you can see in the photos. I changed quite a few things along the way, and the finished unit includes a flashlight and a lit-up radiation display. It still needs weathering, so the exterior is not quite at the final Fallout finish yet.
Credit for the starting point of the physical build goes to the Pimp-Boy 3 Billion project on Instructables. I modified the physical design for my own kit, but the distinction is important: that project was the starting point for the physical Pip-Boy only. The firmware is entirely my own work.
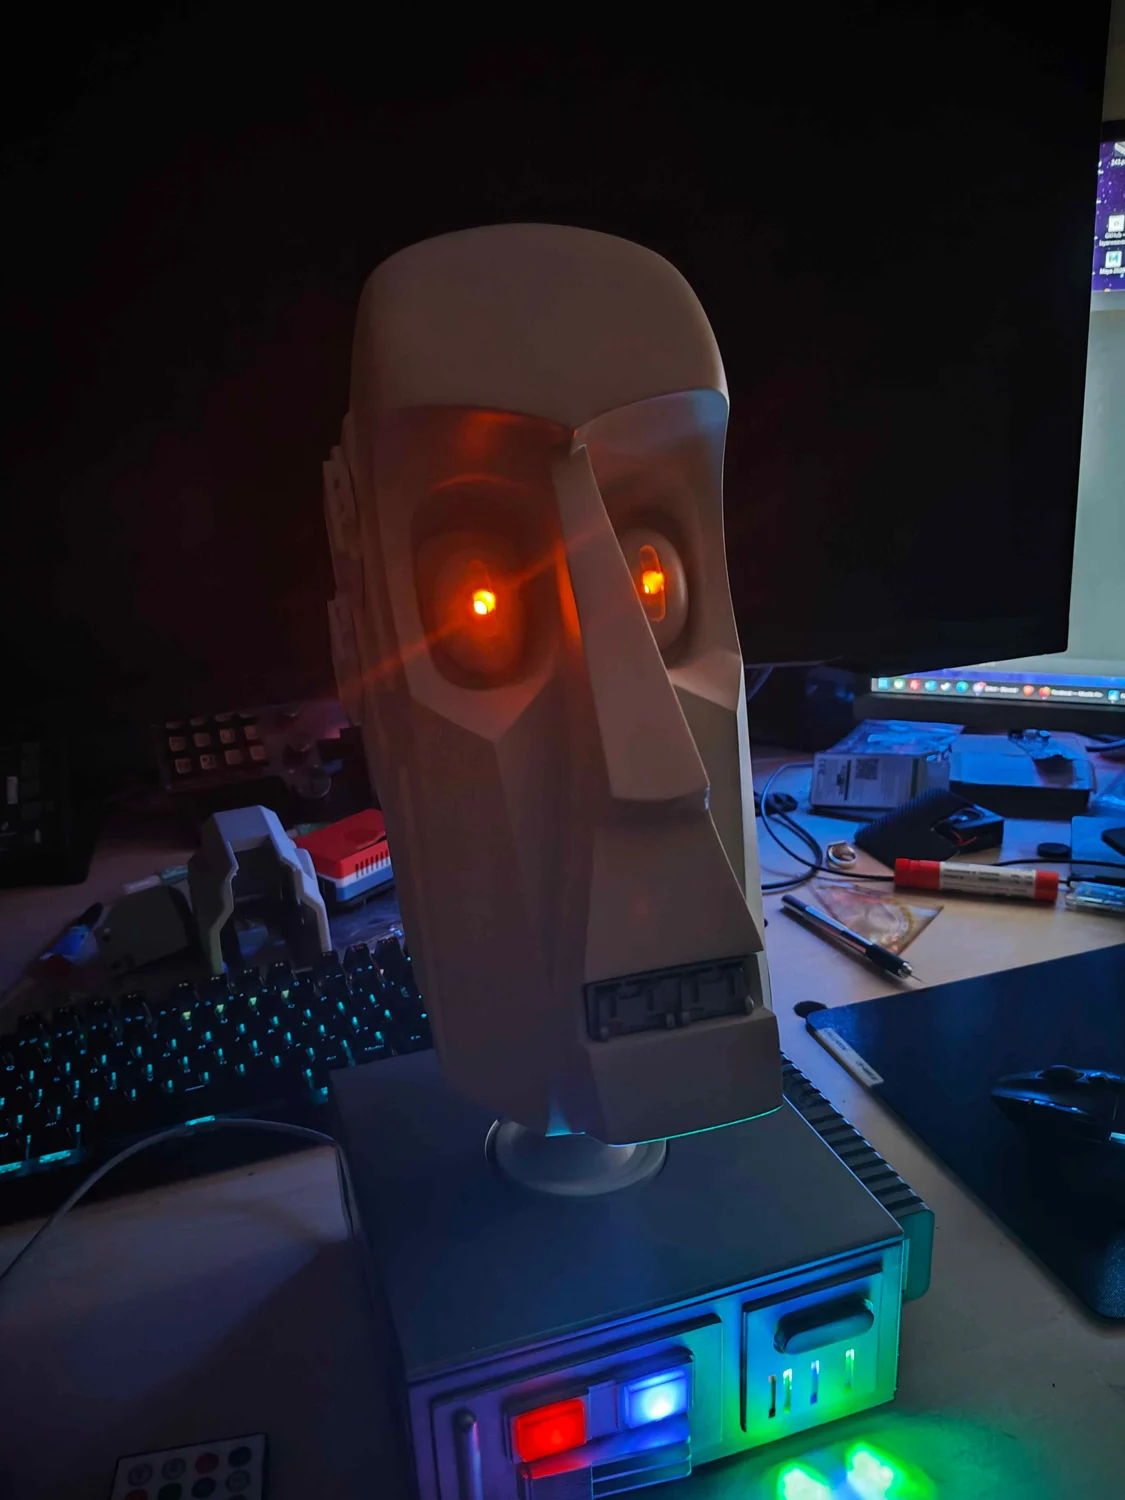
The illuminated 8D8 head on the workbench, before weathering.
Workshop journal / Personal build
Building a Life-Size 8D8 with Lights and Sounds
My life-size 8D8 build has reached the final finishing stage. The droid has lights and sounds, and the only thing left to do is the weathering.
At this point, it is about the finish rather than adding another feature. Weathering will take the clean build toward the worn, used look I want for a Star Wars droid. The full-size character is there; the last job is giving the surface that sense of age.
Workshop journal / Personal build
Empire Strikes Back / Imperial Remnant Commander
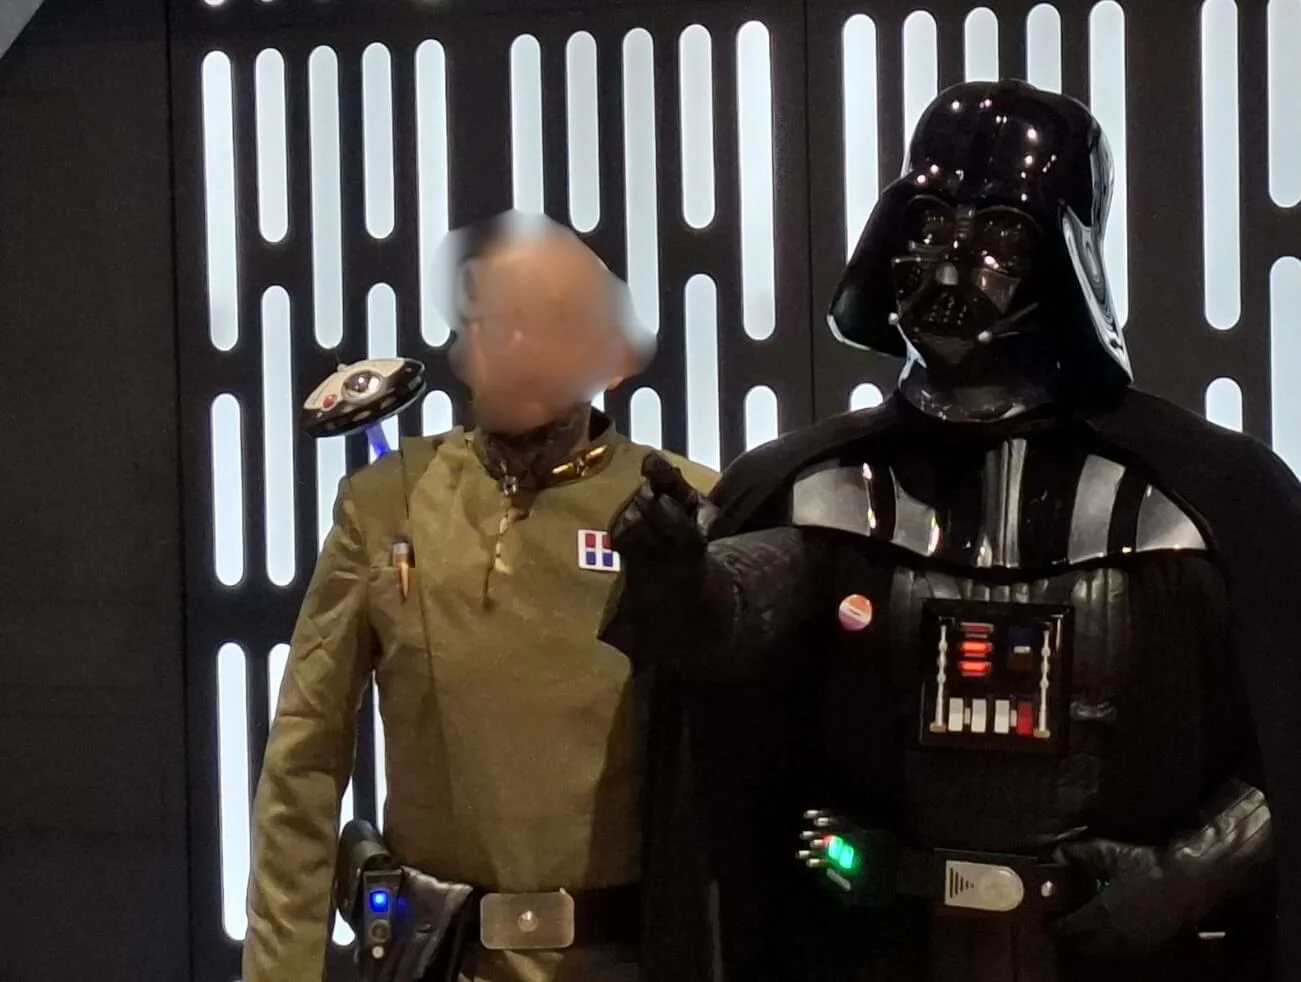
For Comic Con Heroes Summer 2026, I realized far too late that it was going to be much too hot for the Dredd kit. I had to put something together at the last minute.
I already had a couple of Imperial officer outfits, so I decided to make a shoulder mount that would hold a modified Lo-la droid. For the amount of notice I had, it turned out quite nice.
The mount uses two crossed belts to keep the droid attached firmly to my shoulder. The Lo-la droid started as the base Hasbro animatronic version and was given an Imperial makeover.
Workshop journal / Personal build
Finished: My Death Star-Inspired Photobooth
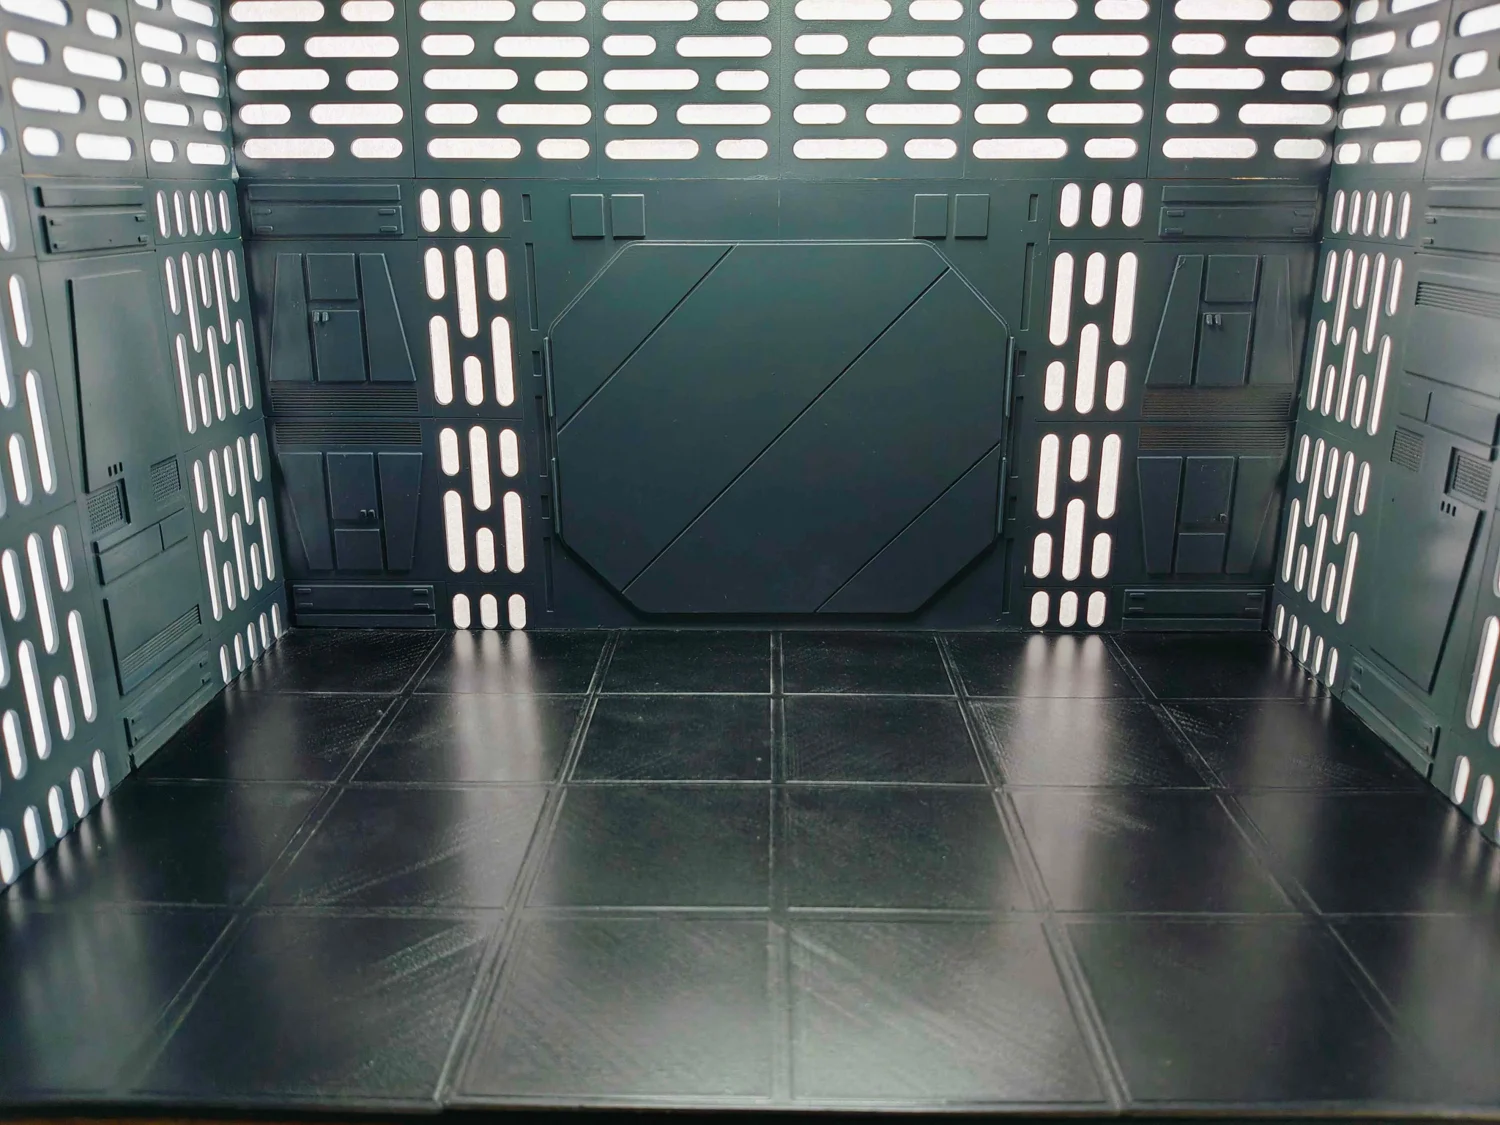
My Death Star-inspired photobooth is finished. This project takes the Star Wars theme and applies it to a photobooth for my prop photos.
The finished booth brings together illuminated wall slots, a geometric door panel and a dark paneled floor. The repeated wall shapes carry the Imperial look around the space, with the central door forming the backdrop.
Workshop journal / Personal build
Judge Dredd 1995
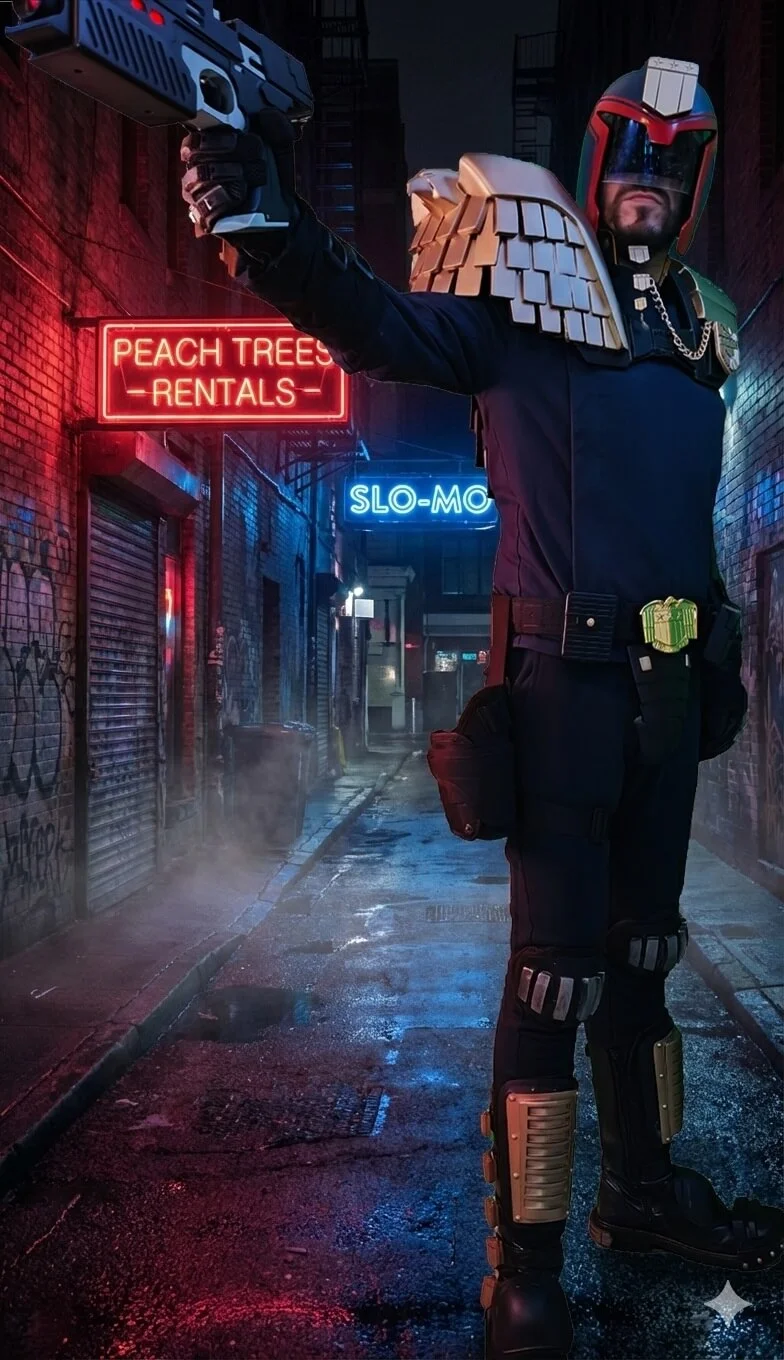
This is my latest full homegrown kit, and it is my pride and joy. The armor was fully done in ASA. Because there were no full scale models available for it, I used various sources to model the armor myself.
The eagle was lifted from a figurine that someone had 3D scanned. Printed in multiple parts, this armor became a mammoth undertaking from start to finish.
The gold is about the best result I could get while still protecting it with a good clear coat. It lacks reflectibility, but it still looks great in the finished kit.
The Lawgiver MKII was also a great project. I made it in a mix of CosPLA and ASA. I added a little gold flair on the side of the Lawgiver because it looked too good not to, but aside from that I tried to stay as close to screen accurate as possible while keeping it practical.
Workshop journal / Personal build
NottBosk’s Back-Mounted Airbox, in TFA Style
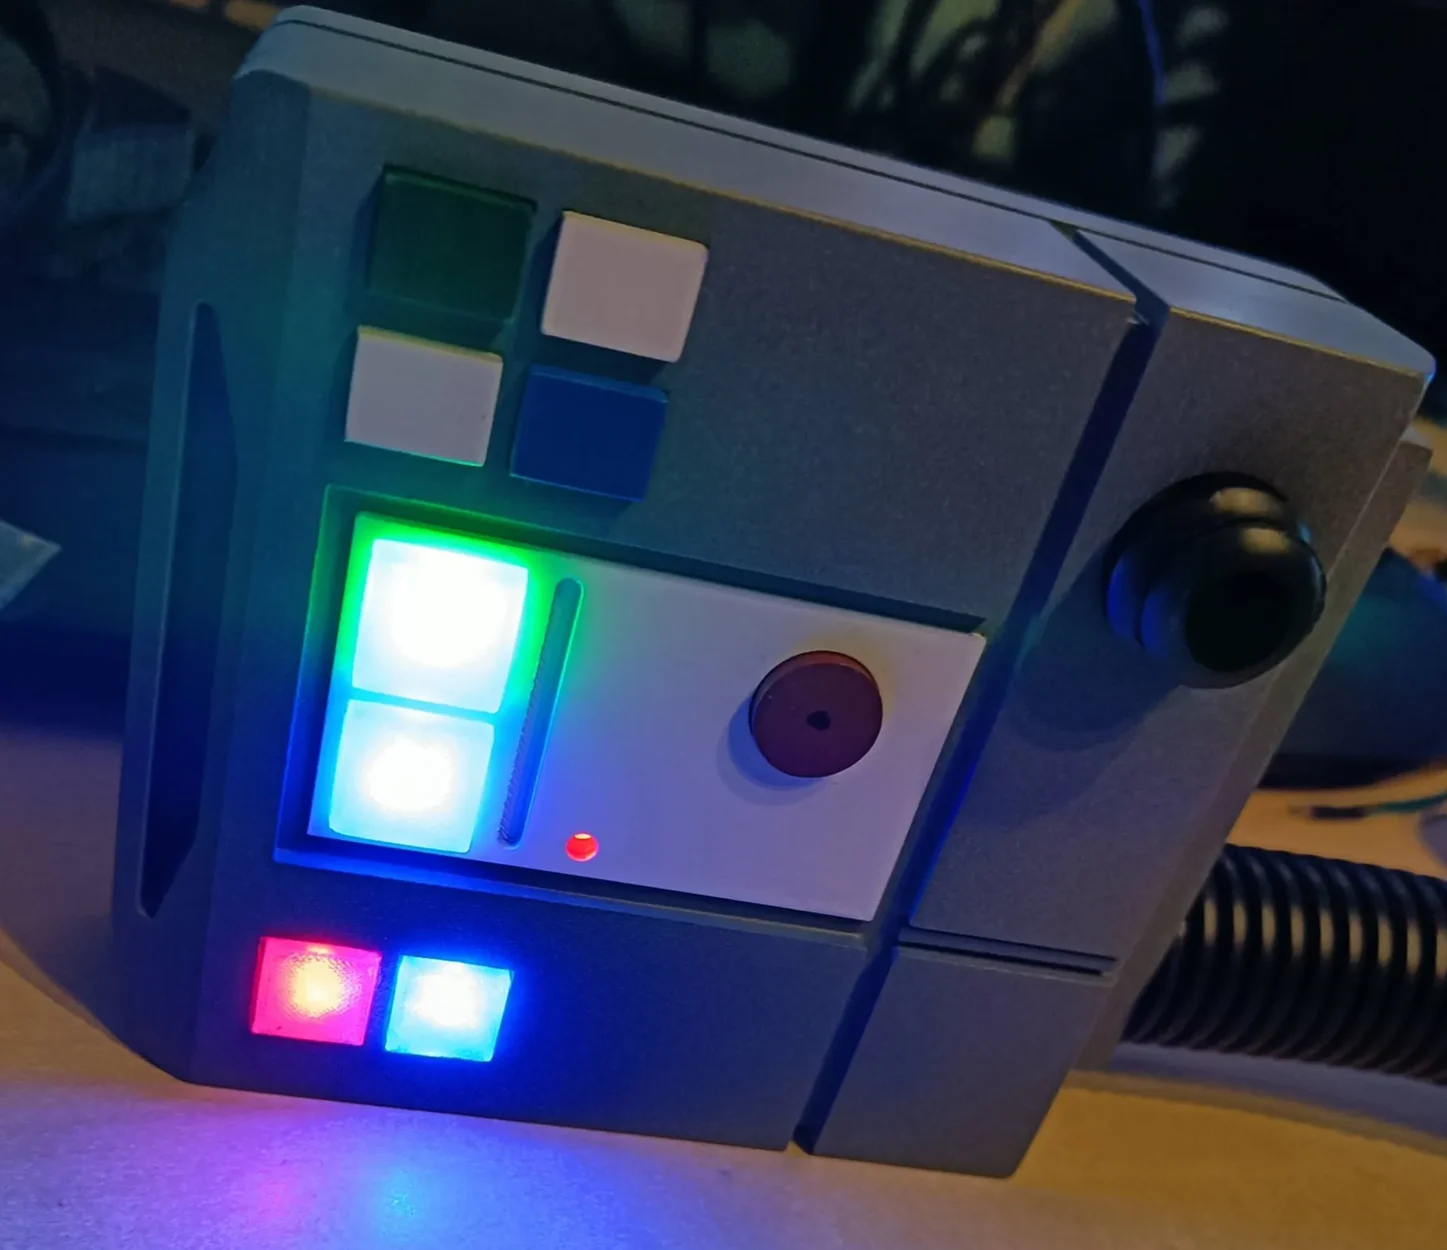
The NottBosk kit has another detail worth its own close-up: the chest/airbox-style unit worn on his back. I made this part in a TFA — The Force Awakens — style, bringing that design direction into the Trandoshan build.
The angular gray housing is broken up by colored panels, round fittings and a corrugated hose. The illuminated green, blue and red sections give the box an active equipment look and stand out against the casing.
Although it uses the visual language of a chest or airbox unit, its position on this costume is on the back. It is a separate detail within the larger NottBosk build, with its own lighting and shape.
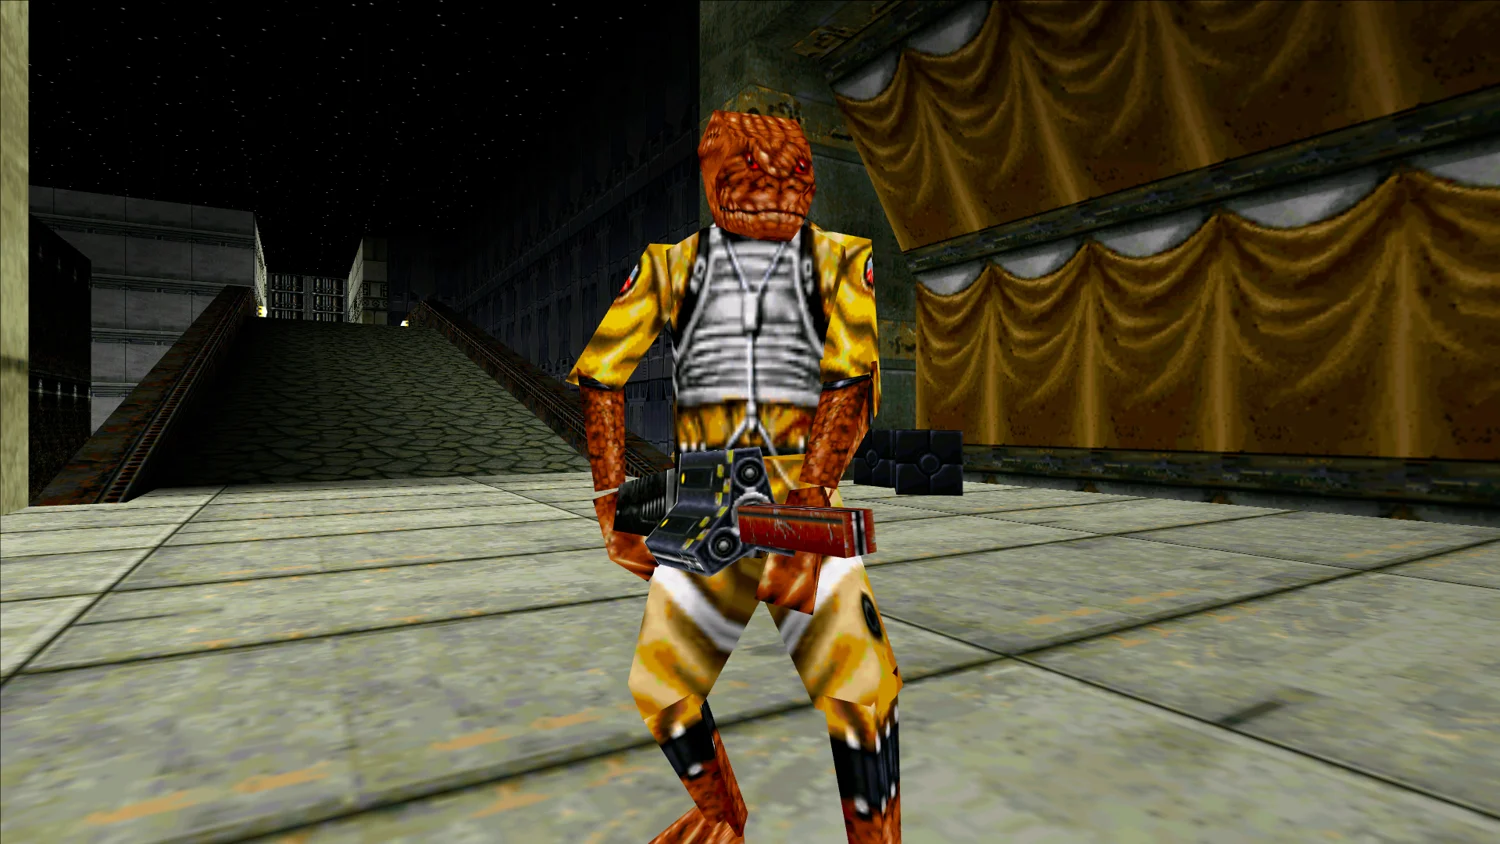
Game reference: the Trandoshan guard that inspired NottBosk.
Workshop journal / Personal build
NottBosk Jedi Knight Fuel Station Guard
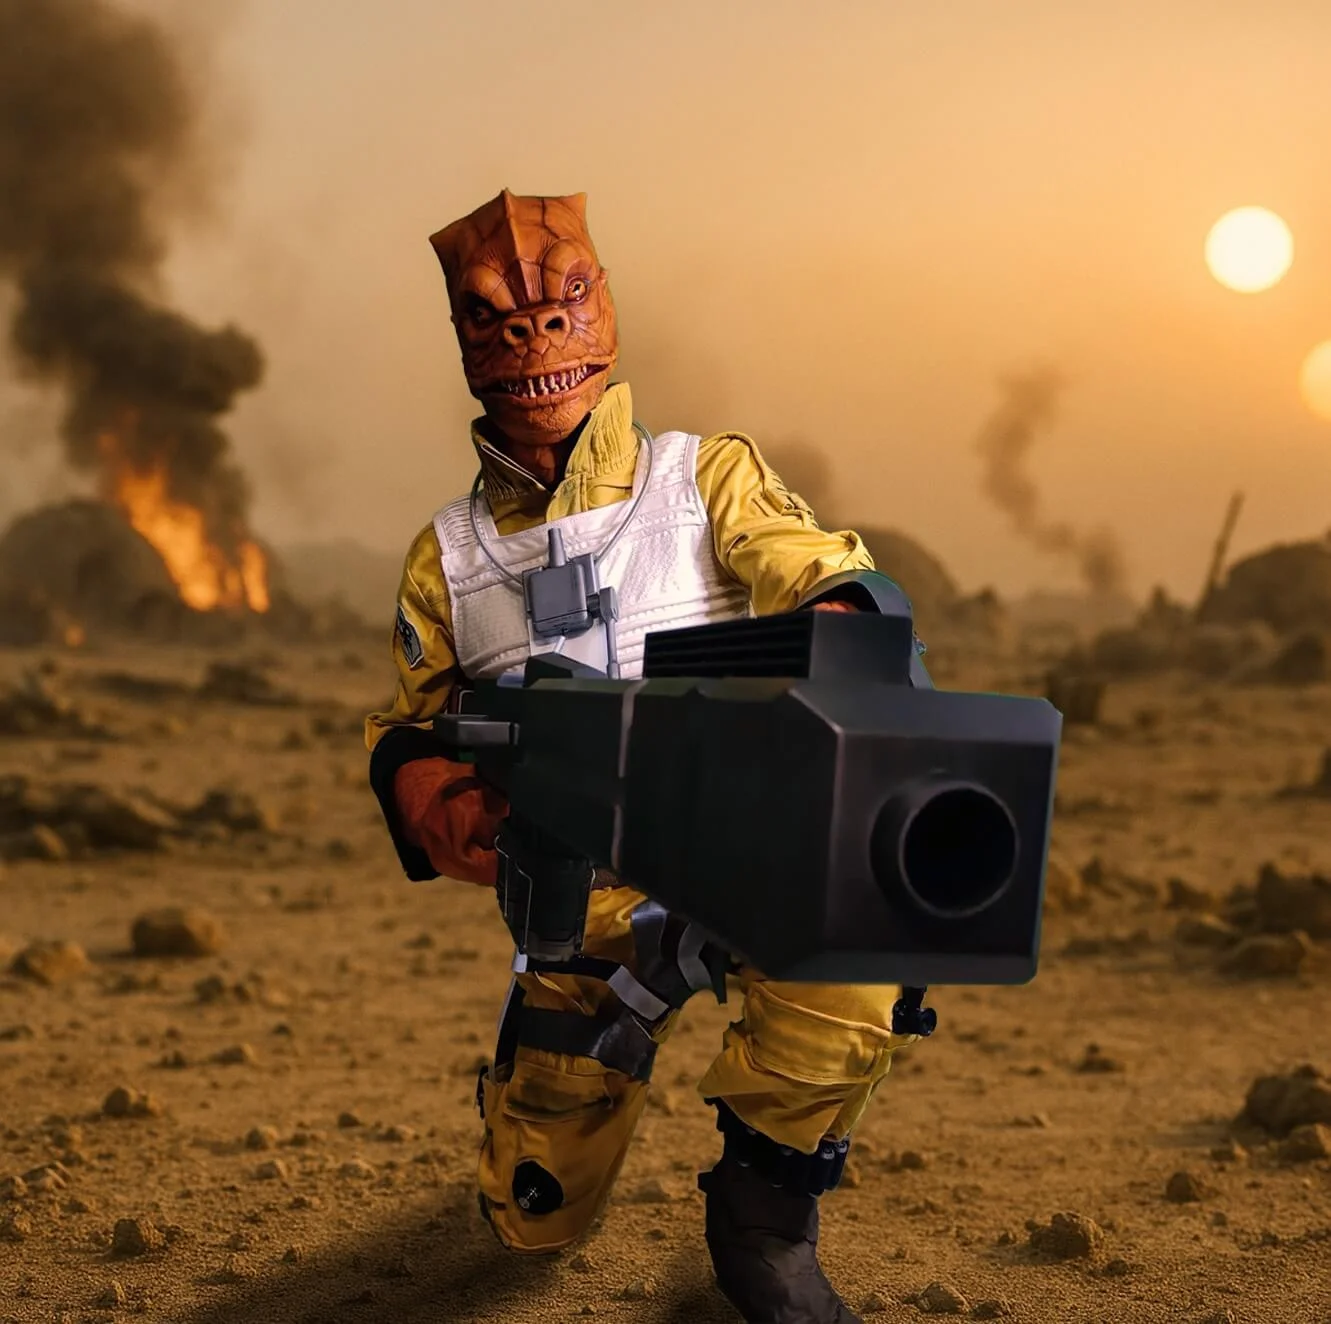
This was my second full build. I did not want to make another Bossk cosplay, but I have always had a huge love for the Jedi Knight games, so I moved the idea in that direction instead.
In Dark Forces II: Jedi Knight, there is a fuel station level, level 7 or 8 if I remember correctly, which was also the demo level. That level has Trandoshan guards with concussion rifles, and that became the target for the cosplay. I feel like I came very close to that look.
Sadly, the mask and arms make the kit not really viable to wear to conventions. Even if it were easier to wear, the concussion rifle is huge and heavy. The kit also includes Trandoshan boots that incorporate their reptilian foot shape.
Workshop journal / Personal build
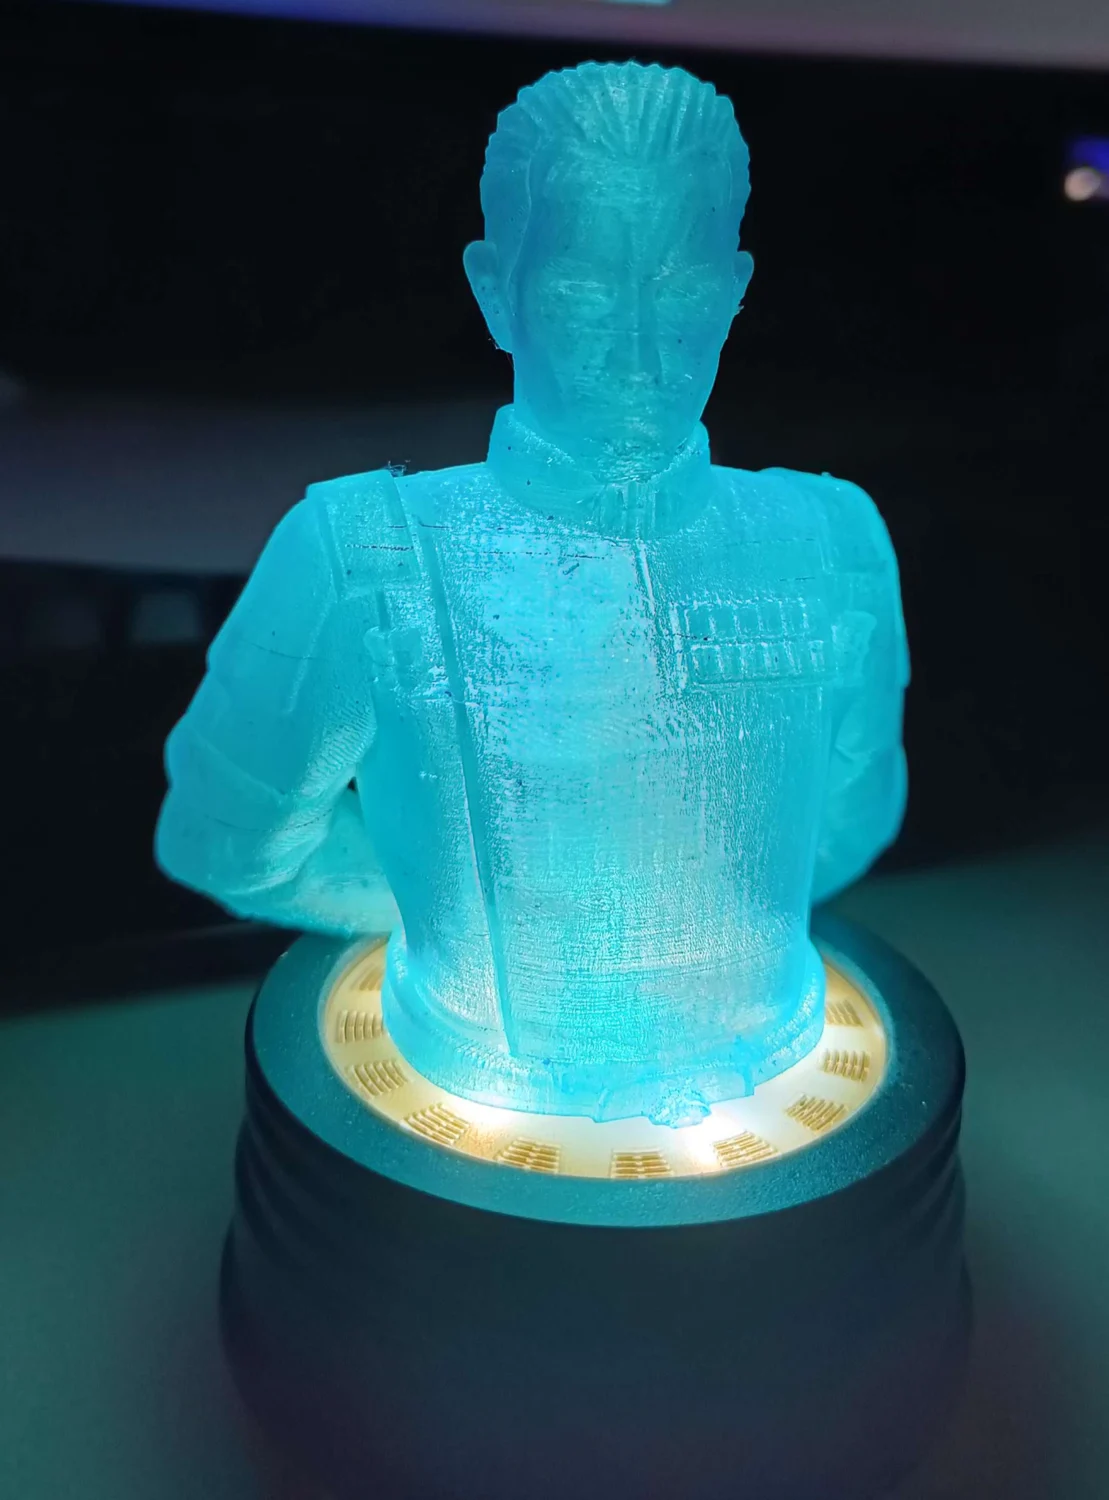
Experimenting with Thin-Filament Hologram Effects
I have been experimenting with hologram-like structures made from thin filament. The idea is to create a physical object that picks up light and suggests the look of a sci-fi hologram.
This test is a blue bust illuminated from a circular base. The thin structure and visible layers catch the light differently from a solid, opaque model, giving the figure a luminous appearance.
It is still a physical filament structure, rather than a projected hologram. This experiment is about the illusion created by the material and lighting together, and how that effect can become part of a sci-fi display.
Workshop journal / Personal build
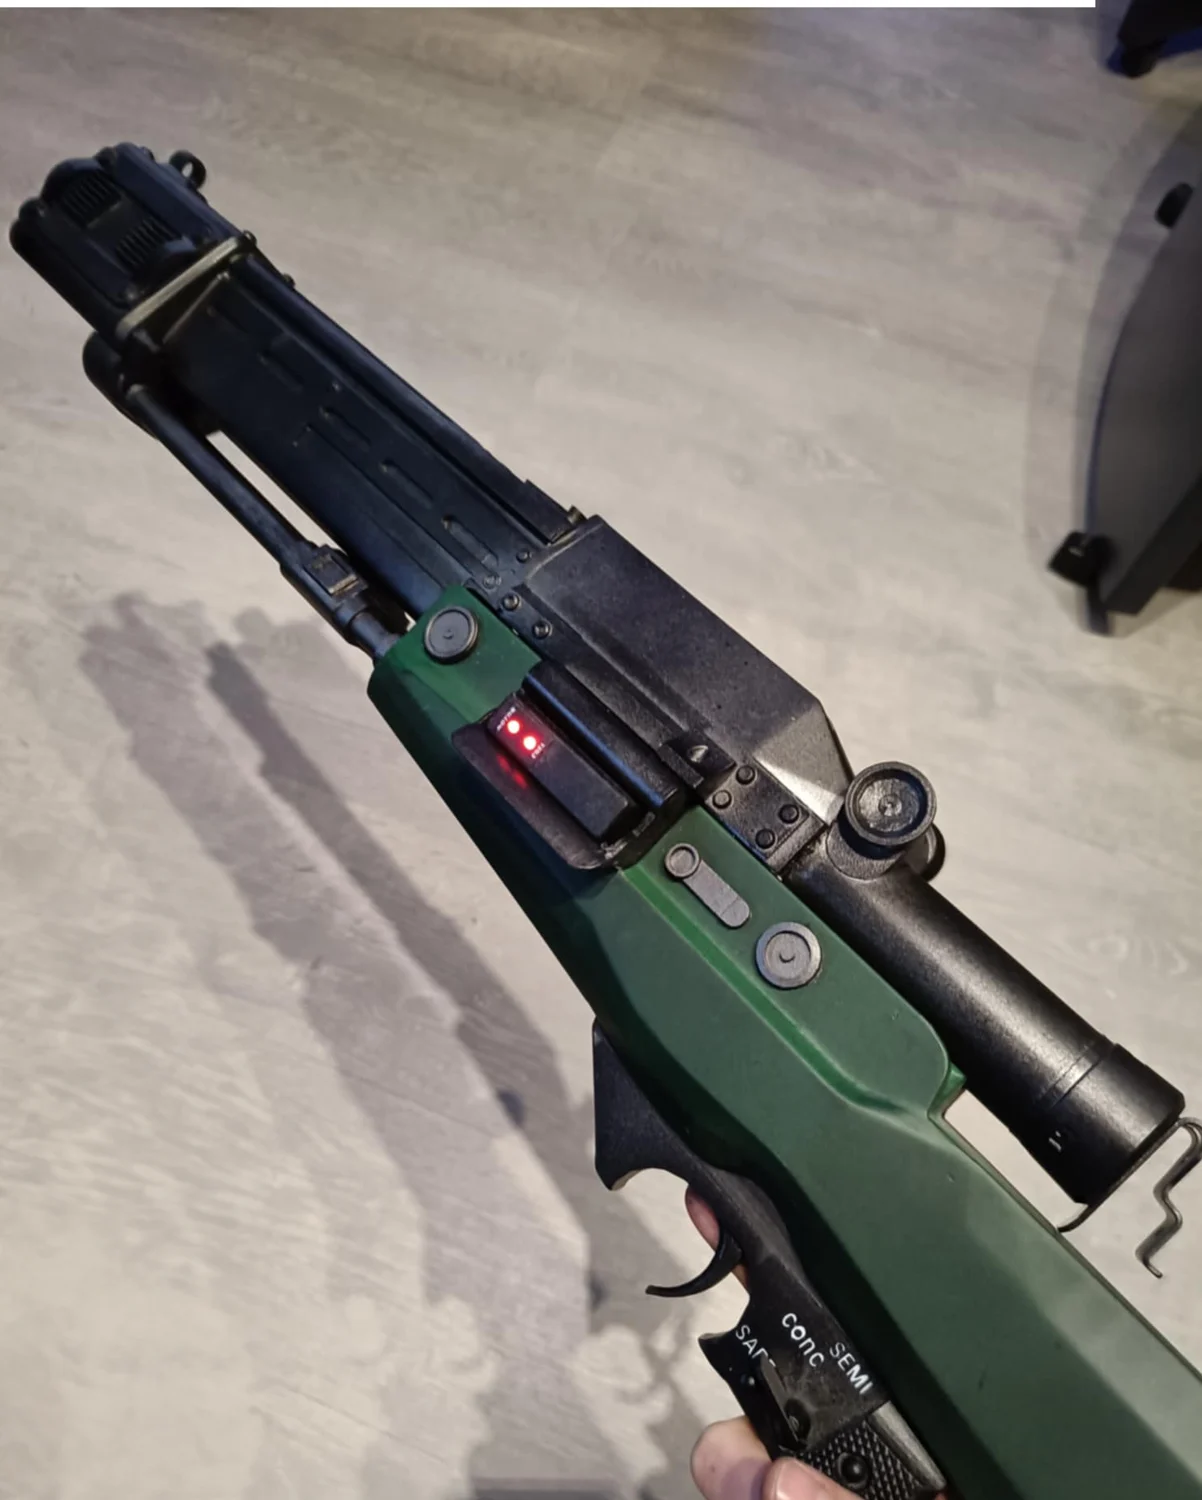
My Custom TL50E — Extended Battlefront-Inspired Build
This is my custom Star Wars TL50E, with the E standing for Extended. The starting point is the TL-50 from Battlefront, taken in my own extended direction for a cosplay prop.
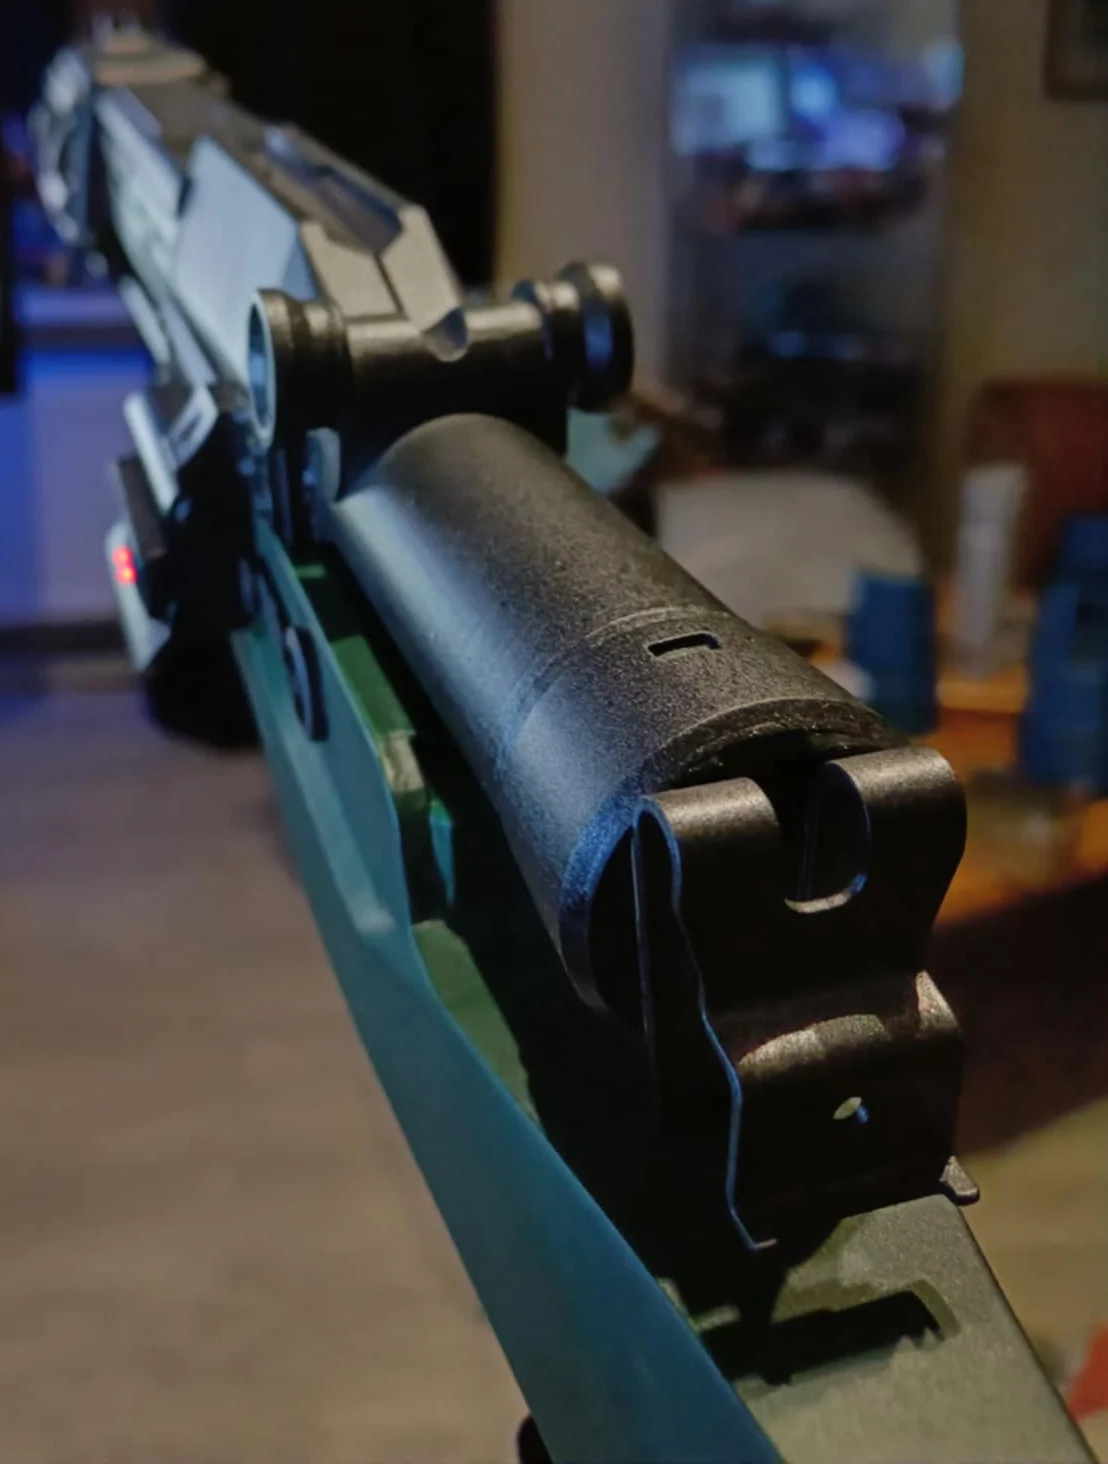
The build has a long, dark upper assembly above a green body, with contrasting metal-colored details and a small red illuminated indicator. The wider photograph shows the overall shape; the close-up gives a better view of the upper assembly and its surface details.
I kept the Battlefront inspiration in the name while giving this version its own identity. TL50E is my name for this custom extended build.
Workshop journal / Personal build
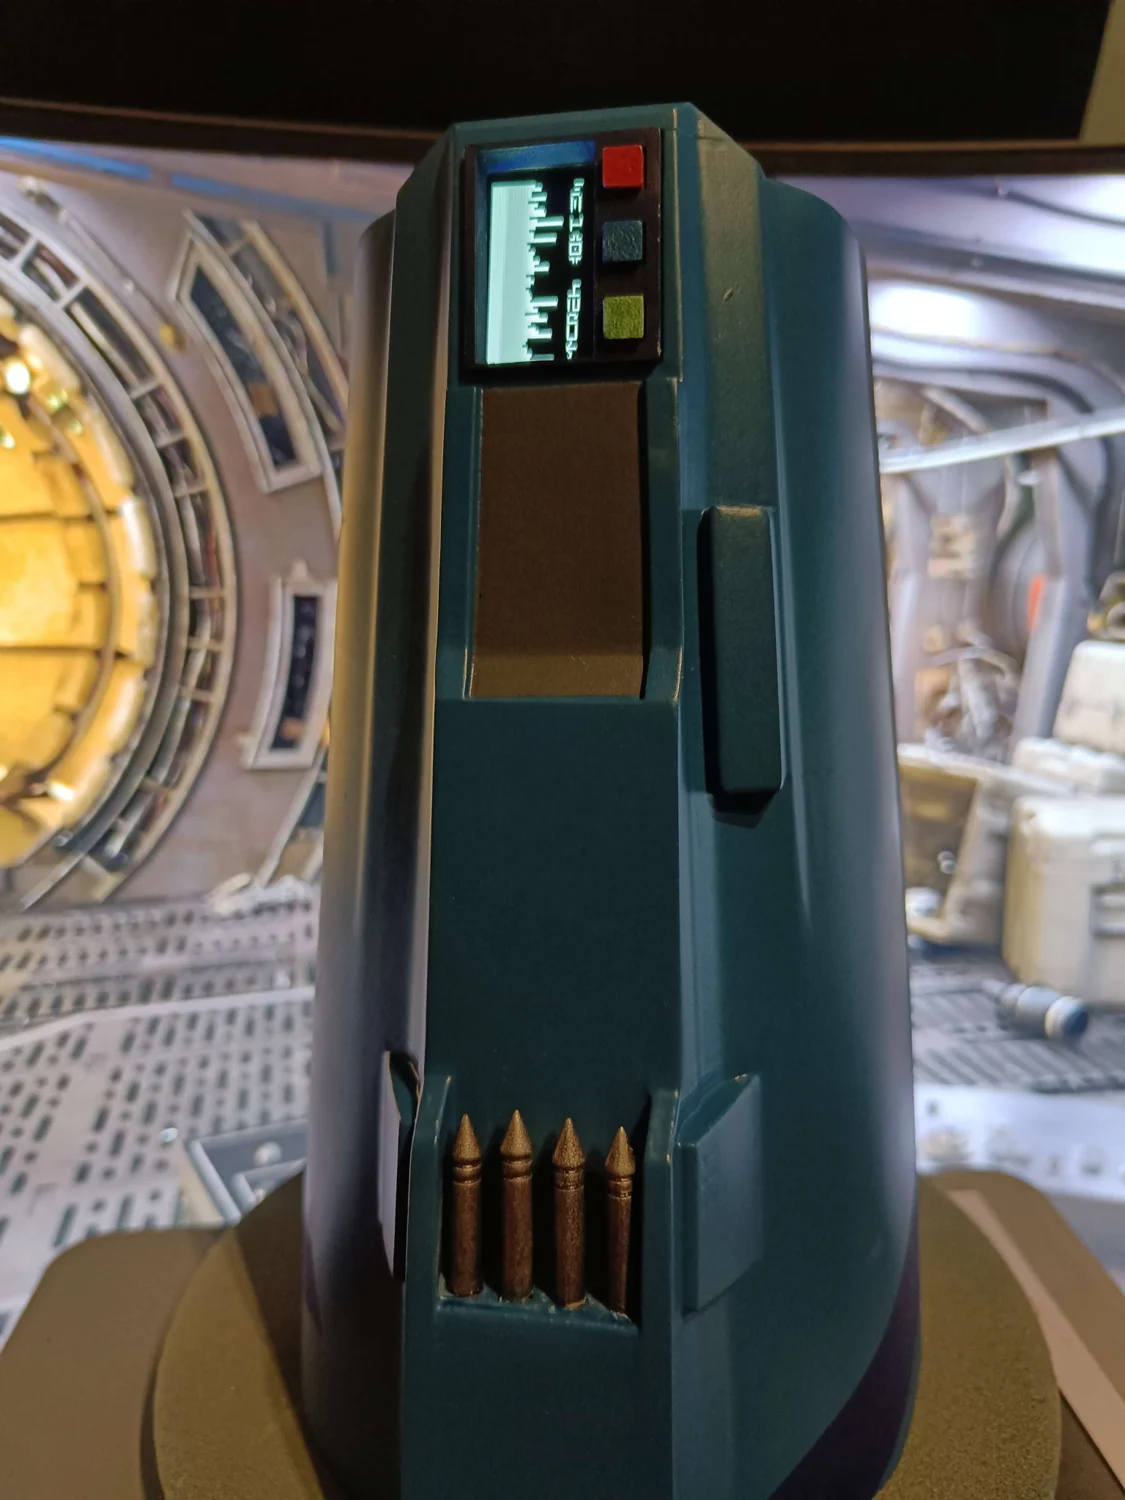
An Interactive Gauntlet for My Mandalorian Kit
This gauntlet is another part of my Mandalorian build: a piece of wearable armor with an interactive display built into it. The small illuminated screen gives the prop an active element alongside the physical detailing.
The blue outer shell frames a long recessed panel, with the display at one end and a row of cartridge-like details at the other. Keeping the electronics within that shape makes the screen part of the gauntlet rather than a separate device attached to it.
It is a closer look at one of the details in the full kit: armor, a working visual element and the small surface details all sharing the same space.
Workshop journal / Personal build
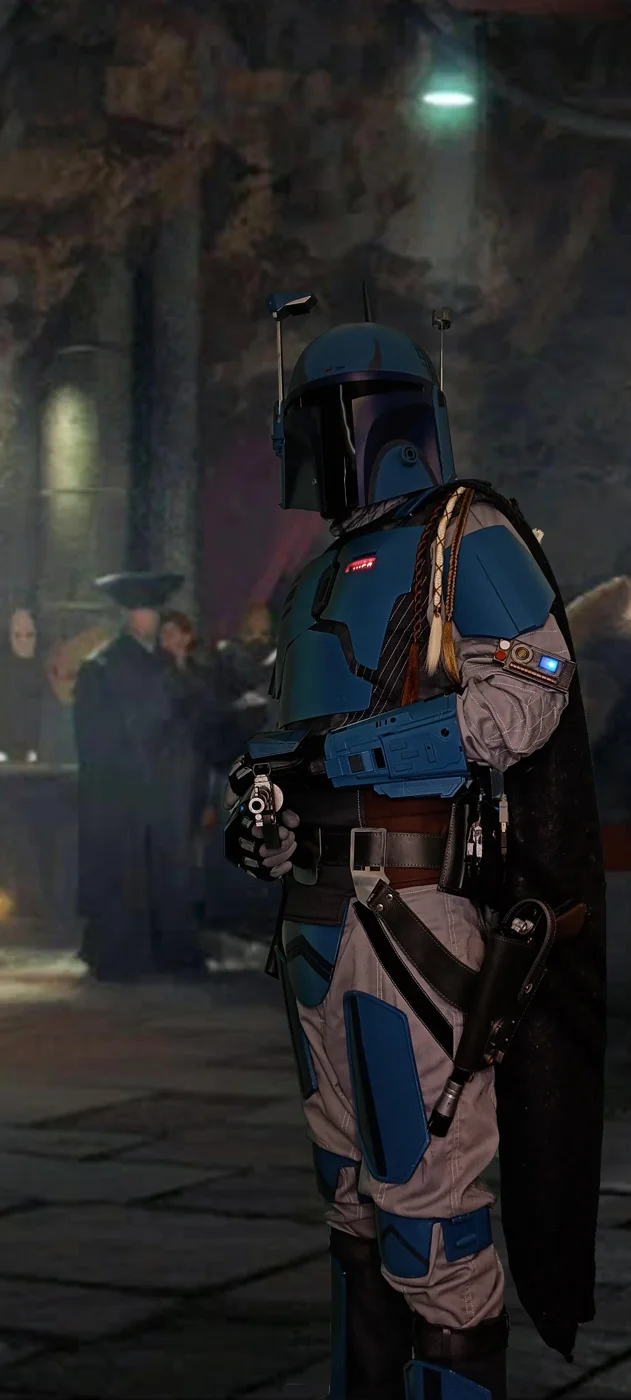
Mandalorian Armor, Death Watch Style
This was my first full build, made with my first small printer, the Flashforge 5M. Most of the armor was printed in PLA at 100% infill, which gives the kit real weight and makes it feel closer to 'real' armor.
The armor is a hodgepodge from various sources, with many custom edits made to push it toward the Death Watch look from Star Wars Galaxies. The helmet additions are custom and bespoke, built specifically for the Death Watch direction.
Like many first builds, it came with mistakes. The most notable issue was the arm pieces: I made them too small, and once the electronics were added, my arms no longer fit inside them. The weapons I made to go with the kit were an IB-94 from The Mandalorian and a DE-5 from Star Wars Galaxies.
Your next build starts here.
Find the finishing touch. Explore the full collection, current prices and availability on Etsy.